First, you want to get all your pieces. For the top layer/pocket pieces, you'll need two strips of flannel. One strip of PUL will do for the waterproof layer, four wing pieces (I use PUL for these), and your absorbent layers (I used flannel, hemp fleece, and microfiber). As far as the pattern goes, you can trace around a maxi pad you already have. Since I was using one of Amber's scraps of PUL that she sent me with the diaperkit, I just trimmed it so it was uniform, and used it as my pattern.
I'm using TWO top layers over this pad because they will overlap, the opposite sides of each remaining open. So, I'll need to add a rolled hem to the opposite sides of each top layer.
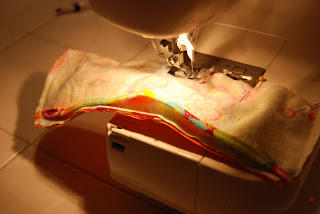
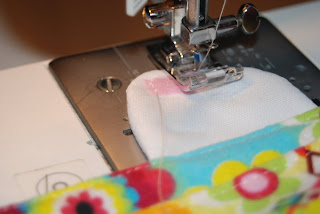
When the rolled hems are done on each top layer of flannel, it's time to sew the wings together. With the right sides together (Shiny, PUL sides out), I sewed one of the wings together. I added a piece of wrapping paper to the top because PUL has a tendency to stick when sewn through a machine and the paper will keep my pieces together and aligned.
Next, I need to pin one of my top layers to the bottom layer, sandwiching one of my wings inside like so.
Then, pin them together.
And sew around three sides--top, bottom, and the unfinished side of my top layer.
Sorry, this picture is dark. I started sewing at one end, and finished at the other.
Voila. One side is closed and secured.
Next, I want to pin the hemmed side of this top layer back.
...and then pin my next wing in place. Once that wing is in place, you put your second top layer over the top and pin it just as you did the first top layer.
And sew together starting at one end of the pad and ending at the other, without sewing through the one side.
...like so.
Once both top layers are sewn to the bottom layer, your pad will look like this when inside out.
...and like this from the other side.
When turned right side out, it will look like this.
It's a little floppy looking, so you need to add a top stitch.
When you do so, make sure not to sew over your opened sides. You might want to pin the inside top layer back so you don't accidentally sew over it.
Then, add your touch tape.
Your outside layer is done at this point, so you need to work on your inner, absorbent layer.
It needs to be smaller than the top layer by at least 1/4 inch. Mine was too big here, as you see, so I trimmed it back.
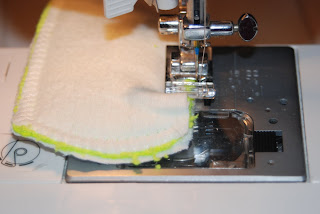
Once trimmed back, I added a zig zag stitch over all the edges. I let the stitch hang over the edge so it would close it up nicely.
Easy!
Here's the finished pad from the top.
And what it looks like on the bottom.
Unfortunately, despite the fact that I'm still breastfeeding (and my daughter doesn't even know what formula tastes like) I get my period. I fact, I think I got it only a month after I stopped bleeding from her birth--doh! So... I know that this pad works well enough. There are definitely some things I'll change about my design in the future--like wider, longer wings, because wings this short don't keep the pad in place on the panty as well. But other than that, it worked well! When I changed it, I just sprayed it with my diaper sprayer and then let it soak in some cold water for a while. Then, I washed it with my diapers, starting with a cold rinse, and then washing like normal. Once all the blood is out, you can wash it on hot. If you wash blood on hot water, though, you'll set the stain because of the protein.And I must say, I really REALLY like using cloth pads. It just feels so much nicer than disposable ones. They always irritate my skin and this one does not! Woo hoo!!!
Okay, so now it's your turn to try it. Let me know how it goes!!!


7 comments:
These have been added to my very long list of to-do projects. :)
cloth pads are so nice! i'm trying to find some to use for after i have this baby. i'm so not crafty like you!! great job!
Cody is almost 10 months and I just had mine for the first time, and it was awful because I bled on the chair in the mother's lounge at church while nursing. I love cloth!
awesome job. a couple of weeks ago I used a mamapad for the first time i was nervous about using it during my heavy time, so I waited a bit but in the middle it was great.
Stopping by to let you know that there is an award for you at my blog!
http://happilysouthernreviews.blogspot.com/2010/02/ive-been-awarded.html
I don't think I will be able to switch.. something about this scares me in fact I hate the sight of blood.. Even though Natalie is 14 months old and only nursing 3 times a day I haven't gotten mine back to even considering it..
I'm definitely considering mamacloth for whenever I start back up again (I have a 4mo girl) - even though I'm winding down on cloth diapers. I bet if I never tell my husband, he'll never notice! :)
Post a Comment