Today is your last opportunity to enter the Diaperkit.com giveaway! So go ahead, scramble over to the giveaway post to get those last comments in because tomorrow morning I will be letting random.org choose a winner for me!!!
Sewing cloth diapers is SO much fun! I can't wait to see who it will be...
Why I Choose to Use Cloth Diapers
Product Reviews
I'd love to review your products and help you spread the word about what you sell. Contact me at clothdiapermommy@yahoo.com if you have a product you'd like me to review and/or giveaway.
Sunday, February 28, 2010
Friday, February 26, 2010
Make your own maxi pad, pocket style
First, you want to get all your pieces. For the top layer/pocket pieces, you'll need two strips of flannel. One strip of PUL will do for the waterproof layer, four wing pieces (I use PUL for these), and your absorbent layers (I used flannel, hemp fleece, and microfiber). As far as the pattern goes, you can trace around a maxi pad you already have. Since I was using one of Amber's scraps of PUL that she sent me with the diaperkit, I just trimmed it so it was uniform, and used it as my pattern.
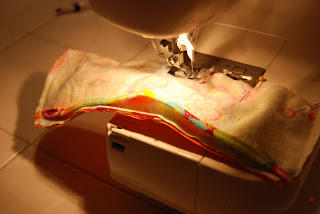
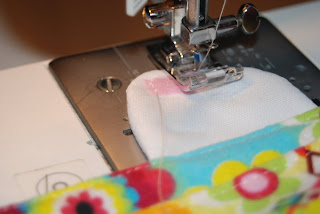
I'm using TWO top layers over this pad because they will overlap, the opposite sides of each remaining open. So, I'll need to add a rolled hem to the opposite sides of each top layer.
When the rolled hems are done on each top layer of flannel, it's time to sew the wings together. With the right sides together (Shiny, PUL sides out), I sewed one of the wings together. I added a piece of wrapping paper to the top because PUL has a tendency to stick when sewn through a machine and the paper will keep my pieces together and aligned.
Next, I need to pin one of my top layers to the bottom layer, sandwiching one of my wings inside like so.
Then, pin them together.
And sew around three sides--top, bottom, and the unfinished side of my top layer.
Sorry, this picture is dark. I started sewing at one end, and finished at the other.
Voila. One side is closed and secured.
Next, I want to pin the hemmed side of this top layer back.
...and then pin my next wing in place. Once that wing is in place, you put your second top layer over the top and pin it just as you did the first top layer.
And sew together starting at one end of the pad and ending at the other, without sewing through the one side.
...like so.
Once both top layers are sewn to the bottom layer, your pad will look like this when inside out.
...and like this from the other side.
When turned right side out, it will look like this.
It's a little floppy looking, so you need to add a top stitch.
When you do so, make sure not to sew over your opened sides. You might want to pin the inside top layer back so you don't accidentally sew over it.
Then, add your touch tape.
Your outside layer is done at this point, so you need to work on your inner, absorbent layer.
It needs to be smaller than the top layer by at least 1/4 inch. Mine was too big here, as you see, so I trimmed it back.
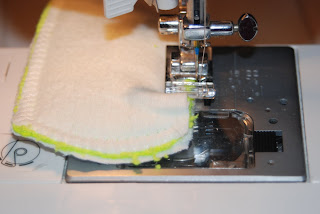
Once trimmed back, I added a zig zag stitch over all the edges. I let the stitch hang over the edge so it would close it up nicely.
Easy!
Here's the finished pad from the top.
And what it looks like on the bottom.
Unfortunately, despite the fact that I'm still breastfeeding (and my daughter doesn't even know what formula tastes like) I get my period. I fact, I think I got it only a month after I stopped bleeding from her birth--doh! So... I know that this pad works well enough. There are definitely some things I'll change about my design in the future--like wider, longer wings, because wings this short don't keep the pad in place on the panty as well. But other than that, it worked well! When I changed it, I just sprayed it with my diaper sprayer and then let it soak in some cold water for a while. Then, I washed it with my diapers, starting with a cold rinse, and then washing like normal. Once all the blood is out, you can wash it on hot. If you wash blood on hot water, though, you'll set the stain because of the protein.And I must say, I really REALLY like using cloth pads. It just feels so much nicer than disposable ones. They always irritate my skin and this one does not! Woo hoo!!!
Okay, so now it's your turn to try it. Let me know how it goes!!!
Thursday, February 25, 2010
A Fluffy Gift
I love giving gifts to people! Really, it's one of the things that gives me the most joy out of life. Not that I am able to do it often, or even thoughtful enough to do it often, but when I can, it's delightful.
THere's a girl at my church who recently had a baby. We were in the nursery together about two weeks ago and I was changing my Bunny.
"Where'd you get those diapers?" she asked me as I pulled out the insert from a dirty bumGenius and stuffed the diaper and insert into my little wetbag. "I ain't never seen any diapers like that before!"
"Online," I said. "But if you're interested, I"ll make you some.
She certainly was so I got to work over the course of the next week and made these diapers for her:

A-D--some upcycled T-shirt fitteds--small (My own pattern that I've been perfecting lately based on measurements of my daughter)
E--a pocket diaper, from the same pattern as the fitteds--made of navy PUL, white microsuede, and a microfiber/hemp fleece insert wrapped in flannel
F-G--Size 2 diaper covers from diaperkit.com (only about $5.50 a piece!)
H--a Deluxe Flannel AIO diaper from Diaperkit.com, size 2
I think it's a good start for someone who has no cloth and no experience with cloth. I also gave her a list of my favorite places to buy cloth diapers, washing instructions, and the name of a store a few towns down that sells a few brands of cloth. I hope it works for her. I think my hope is kind of selfish because I spent so much time and effort on these little babies that I'd be heartbroken if I ever heard that they didn't work and weren't being used. But she seemed pretty excited about them so I hope she'll use them!
THere's a girl at my church who recently had a baby. We were in the nursery together about two weeks ago and I was changing my Bunny.
"Where'd you get those diapers?" she asked me as I pulled out the insert from a dirty bumGenius and stuffed the diaper and insert into my little wetbag. "I ain't never seen any diapers like that before!"
"Online," I said. "But if you're interested, I"ll make you some.
She certainly was so I got to work over the course of the next week and made these diapers for her:

A-D--some upcycled T-shirt fitteds--small (My own pattern that I've been perfecting lately based on measurements of my daughter)
E--a pocket diaper, from the same pattern as the fitteds--made of navy PUL, white microsuede, and a microfiber/hemp fleece insert wrapped in flannel
F-G--Size 2 diaper covers from diaperkit.com (only about $5.50 a piece!)
H--a Deluxe Flannel AIO diaper from Diaperkit.com, size 2
I think it's a good start for someone who has no cloth and no experience with cloth. I also gave her a list of my favorite places to buy cloth diapers, washing instructions, and the name of a store a few towns down that sells a few brands of cloth. I hope it works for her. I think my hope is kind of selfish because I spent so much time and effort on these little babies that I'd be heartbroken if I ever heard that they didn't work and weren't being used. But she seemed pretty excited about them so I hope she'll use them!
Sunday, February 21, 2010
Don't forget to enter my giveaway!!!
You have one more week to enter to win a Deluxe Flannel AIO Diaperkit from Diaperkit.com. Go HERE to see the details!!!
Friday, February 19, 2010
Make Your Own Baby Wipes
Okay guys. So if you're afraid to break out that sewing machine for the first time and plunge your needle in to something like a cloth diaper, then this is the project for you. It's a great starting out/confidence building sewing project so pay close attention.
MAKE YOUR OWN BABY WIPES:
First, I start out with flannel. Flannel is a good fabric for beginners because it's woven and not knit which means it doesn't stretch--good for first time seamstresses. It's also soft and absorbent so it makes a great baby wipe.
Since flannel shrinks, you want to prewash it before working with it. This is a good rule of thumb for any sewing project, actually.


God bless your efforts!
MAKE YOUR OWN BABY WIPES:
First, I start out with flannel. Flannel is a good fabric for beginners because it's woven and not knit which means it doesn't stretch--good for first time seamstresses. It's also soft and absorbent so it makes a great baby wipe.
Since flannel shrinks, you want to prewash it before working with it. This is a good rule of thumb for any sewing project, actually.
I don't have a serger so I will be turning my fabric inside out to sew so that the seams remain inside and unseen. So, I ironed it with the right sides facing each other.

Once it's ironed, you want to decide what size wipes you want. My current cloth wipes (also handmade) are about 7" squared. I decided to make these 8" squared because when turned out they will be smaller--about 7 1/2." So, mark off lines on your fabric for the squares with a ruler and a pen or a pencil. The marks won't be seen because they're on the inside of the fabric. And anyway, they'll eventually wash off.

Now, cut out your squares based on the lines you marked on your fabric.

You want to choose a thread that coordinates with your fabric because you'll be putting a couple of top stitches on your wipes (top stitching is when you sew seams onto the outside of your garment/project)

Time to sew the inner seam! Very easy. Leave about a 1/4 inch seam allowance, and sew a stitch along the edges of your wipe, leaving about 5 inches open (un sewn) for you to turn the wipe right side out.

Your wipe will look like this when it's been stitched all the way around:

Now, trim the corners so that when you turn the wipe right side out they'll be nice and crisp.

Time to turn it right side out.
Next, it's important to iron the wipe so all the seams will be nice and crisp. Since flannel is made of cotton, you can set your iron on high. I like to start by ironing the inside of the opened seam on both sides, so that I won't have to pin this part in place when I sew it up.

Then, I iron the entire wipe.

Once it's ironed, it's time to top stitch it. I like to start just before my opened edge begins to make sure that part is sewn closed properly. Since the rest of the wipe is already sewn on the inside, I know it will stay in place when I top stitch. I don't leave much of a seam allowance here. You want to make sure your seam is close enough to the edge that it will catch the inner seam allowance or your wipe will still have a hole on the open edge.

This is what your wipe will look like once top stitched. Your wipe is now complete if you want it to be.
However, I like to add one more top stitch to ensure that my layers will stay together throughout the duration of the wipe's life :-D. So if you want to add another stitch as I did, then, go for it! You could even try a decorative stitch here to dress it up some! My finished wipe looked like this:
Now, wasn't that easy? Don't you feel like you can do it? If you're afraid to start sewing but you really want to learn how, then start here. It's a simple project and there's no need for perfection because this is going to be used for wiping little bottoms, noses, and spit up.
God bless your efforts!
Let me know how it goes for you!
Subscribe to:
Posts (Atom)
