Okay, I'll try to give you the pattern, but keep in mind I'm a novice knitter, so forgive me if I don't say things correctly.
I'm not good at knitting patterns anyway--well, not at giving them to people. But I'll describe the soaker briefly. It's basically a triangle. Here's the pattern without abbreviations because if you're like me you don't know what those abbreviations mean. Well, I'm learning but i just wish knitting patterns would spell things out for you rather than assume you know what all those letters and numbers mean!
FYI, this is not my pattern. A friend gave it to me, photocopied from a book. I wish I could tell you the name of the book but I keep forgetting to ask her!
Okay, here goes:
You will need size 7" needles, at least 10 inches long
100% wool yarn
A crochet hook
a tapestry needle
For embelishments:
Size 5" needles
Tapestry needle
Soaker:
(This soaker didn't seem to have a size on the pattern, but it fits my 16lb girl generously so I"m thinking it will fit about 15lbs-25 or 30lbs (M,L). I'm not sure how many stitches you would start with for a smaller baby)
*Cast On 90 stitches.
*Right Side: Knit 2, Purl 2, repeat til last two stitches, and knit 2.
* Wrong SIde: Purl 2, knit 2, repeat til last two stitches and purl 2
* You will repeat these first two rows for about an inch.
*On the wrong side, purl 2, knit 1, yarn over, knit 1, repeat til the end, last two stitches will be purls
*Then knit 2 purl 1 purl 2 together (the yarn over and the second purl), repeat til the end of the row, ending in two knit stitches.
*Continue with the ribbing for another inch, alternating with pairs of knits and purls. (The next row will be on the wrong side so it will be Purl 2, knit2, repeat til last two stitches, purl 2)
*When you have two inches of a ribbed waistband done including eyelets for the drawstring, you're going to start with either a garter stitch or a stockinette stitch. I've done both and I prefer stockinette because it looks so pretty, but it is slightly more complicated and only very slightly. Actually with this particular soaker, I created stripes by switching the stockinette stitch to the wrong side for 6 rows, then switching back. Don't know if I'd do it again, though, because it's hard to match up the stripes in the front when you sew the triangle together)
The actual pattern calls for you to knit every stitch from now on, knitting two together at the last two stitches of every row. This will create a garter stitch finish. It's also very easy.
For this particular soaker I knit one row, then Knit the last two together, then purled one row and purled the last two together to create my stockinette stitch finish. It created my triangle, but the two sides of the triangle looked different--I mean, the edges of each side looked slightly different, but the triangle was nice and symmetrical and the difference is barely noticeable.
To rectify that problem, in the future I'd like to try knitting a row with a slip slip knit at the beginning and a Knit 2 together at the end, and then purling a row, and repeating til there are two stitches, but I don't know how many stitches that would leave at the end.
Are you confused yet? I hope not. I just want to help you do this yourself if you choose. :-)
(If you want to sew embellishments onto your soaker, now is the time to do it--before you sew it up. Though, it is possible to put them on a completed soaker as well so if you forget, don't worry!)
Once you have your triangle completed, you're going to pull the two sides of the ribbed waistband together and sew them together. Then, pull the tip of the triangle up so it touches the seam of the ribbed waistband, and sew down each side about 2-3 inches. (2 if your little one has chunky thighs, 3 if they're skinnier)
It will look like this when sewn...well, it might look better because I'm not good at sewing my knit seams together seamlessly yet

I sort of made the pattern for the rosettes and leaves up myself. I'll give you my best guestimate of how to make them now if you're interested.
Leaves:
1st row: Cast on 2 stiches
2nd row: Purl 2
3rd row: knit 1, make 1, knit 1, make 1, knit 1
4th row: purl 5
5th row: knit 1 make 1 knit 3 make 1 knit 1
6th row: purl 7
7th row: knit 7
8th row: purl 7
9th row: slip slip knit, knit 3, knit 2 together
10th row: Purl 5
11th row: Slip slip knit, knit 1, knit 2 together
12th row: purl 3
13th row. Either slip slip knit and knit 1, or knit 1 then knit 2 together.
Bind off leaving a nice, long string
Weave one end of the string into the leaf, leave the other end out to sew the leave onto your soaker. You can either sew all of the leaf on, or just the one half, giving it a more 3D look.
Rosettes:
1st Cast on 10 stitches (you can cast on less for a smaller flower, more for a larger one)
2nd Purl 10 stitches
3rd Knit 1, yarn over, repeat til last stitch, knit one
4th Purl all stitches.
5th knit 1, yarn over, repeat til last stitch, knit one
6th Purl all stitches
7th bind off.
You will be left with a ruffle. Take the length of yarn at the top (wider end) of the ruffle, and weave it in using a tapestry needle. Use the length of yarn at the bottom of the ruffle (smaller end) to sew it onto your soaker.
First, you'll roll the ruffle into a flower. Then, secure it with a few stitches, forming it to the shape you desire. Then, use your tapestry needle to sew it onto the soaker, preferably next to a leaf or two.
If you have trouble with any of these steps, you can always search you tube for a video tutorial. That's what I did when my friend wasn't readily available to help me. I learned a lot from you tube since I'm the type of person who has to see it done rather than look at pictures in a book.
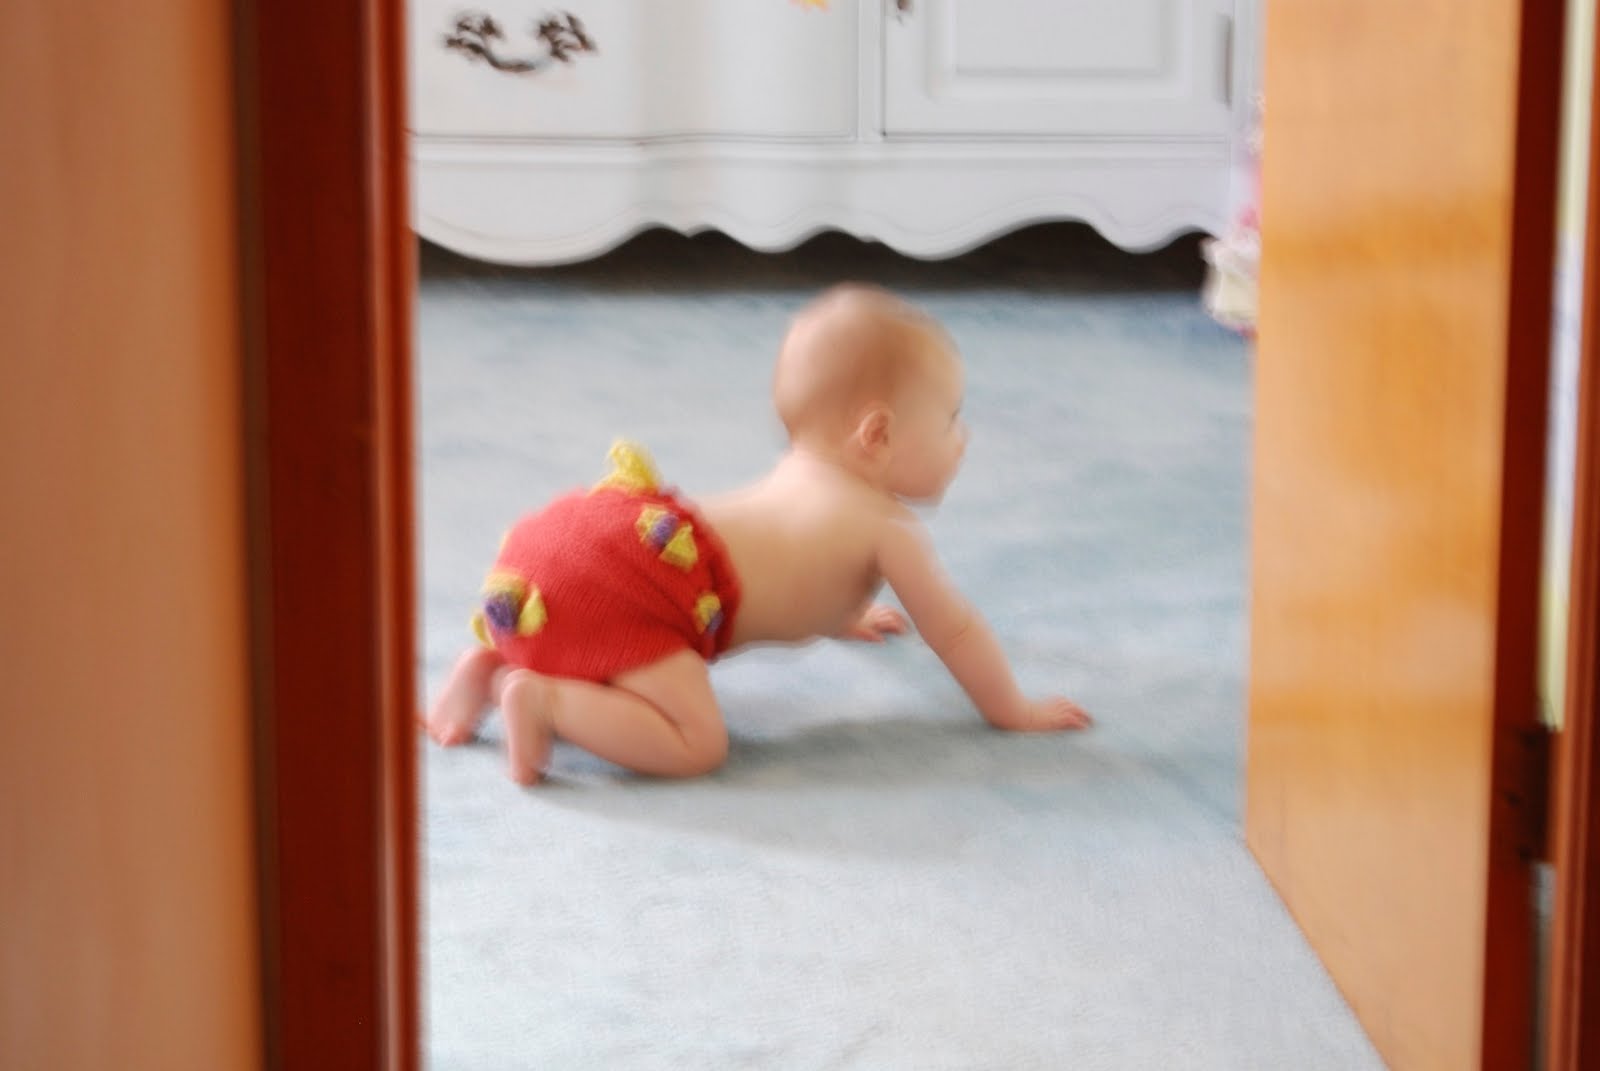
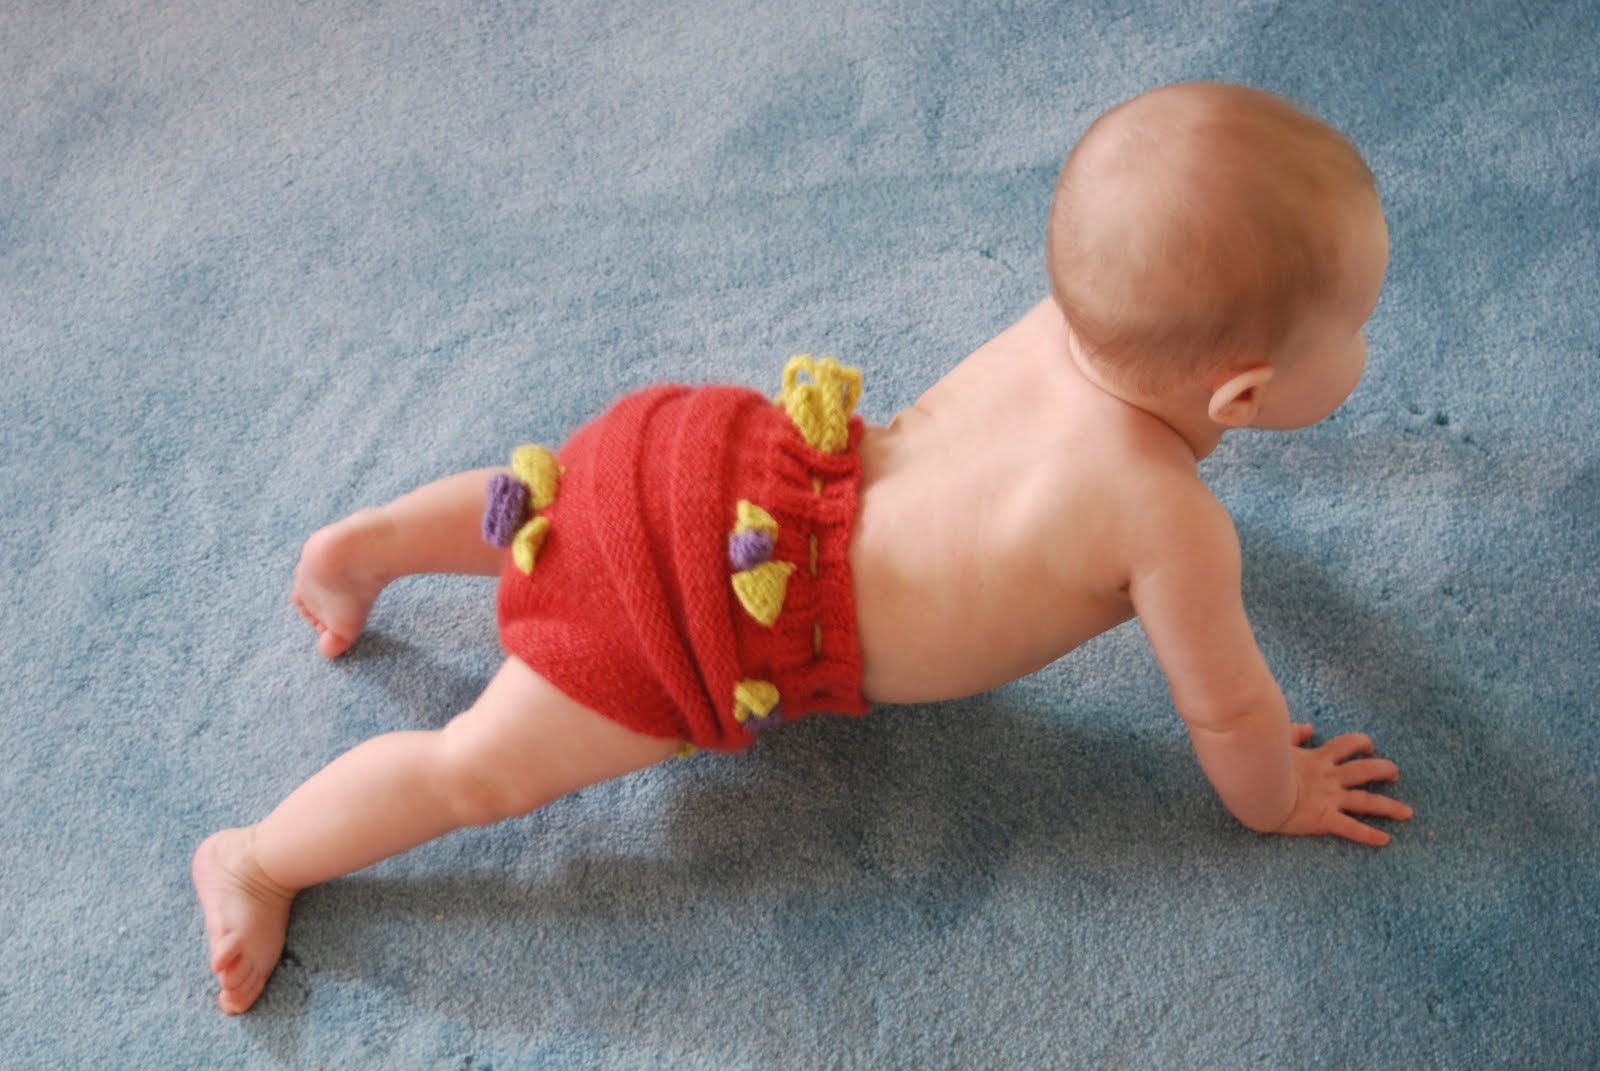
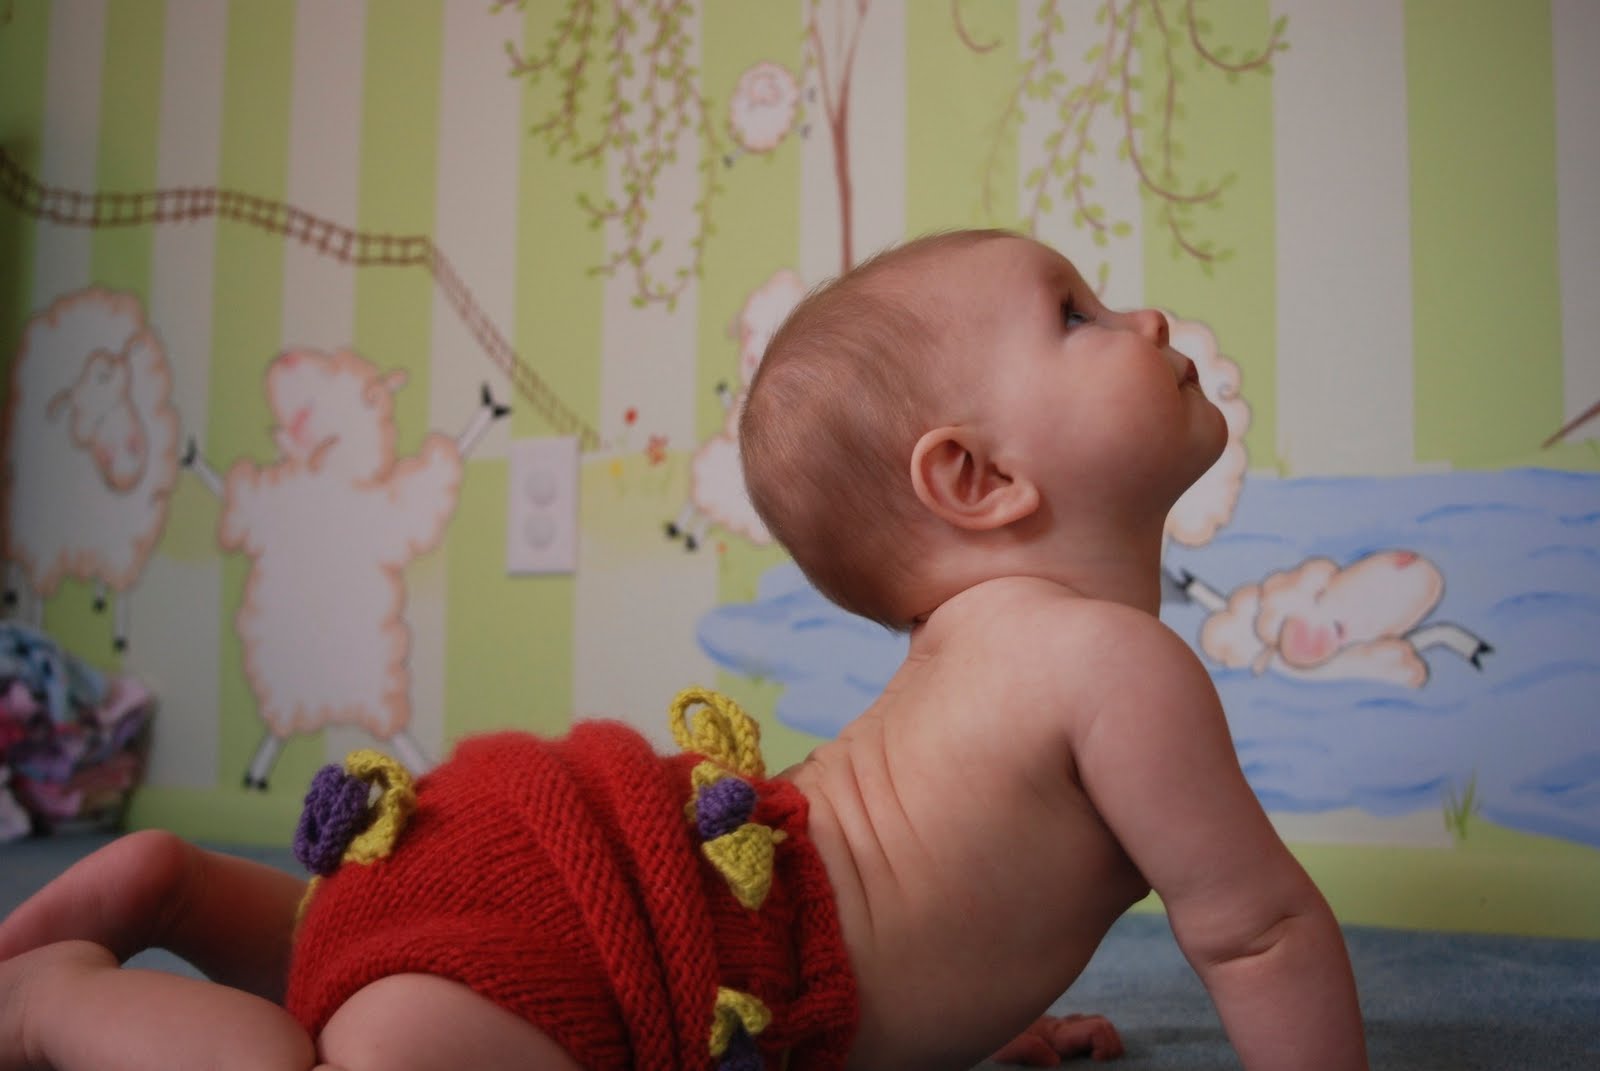
When I was done with my soaker, it looked like this on my pretty, little girl and I was pleased :-D


Let me know if you have any questions on how to make this. I want to emphasize that my knitting experience is not very vast, and a lot of the time, I don't really know what I'm doing or how to explain it to some one else. I would suggest you only ask me questions as a last resort as I'm sure you all know some expert knitter who would be much more likely to be able to help you :-D
Good luck!
5 comments:
very cute, and I'd love to see all the mural, post it sometime, or is it on facebook
gorgeous soaker! I second posting pictures of the mural. I'd love to see it!
OMG I totally didn't realize you make that soaker! It is awesome, great job!
Of course we aren't tired of seeing your projects! I agree with the first post that I'd also like to see your mural sometime. The little snippet we could see looked fantastic. Thanks for sharing your newest soaker!
sorry all my blogs are so confusing! and then there's my wordpress blogs. :P :)
Actually my main cloth diapering blog is simplymerry.wordpress.com - i was planning to make clothdiaperscompared.blogspot.com more "professional" and keep that one personal.
I just need to focus on sewing my sis-in-law's wedding dress, and work on a project (cult-recovery related) God has been pushing me to do since last summer :oops:
thanks for the encouragement to enter the KN giveaway. I'll reconsider it. Just haven't done photoshoots lately with baby because he's been a *wreck* for the past few weeks. I'm guessing colic. :(
And thanks for the congrats. I'm having nighttime trouble, so've been wanting to try fitted/covers (I have mostly pockets, and a few AIO/AI2s). ...and, it's hard to *not* enter a giveaway for a diaper I haven't tried yet. I'm sure you have no idea what I mean. ;)
:need-to-break-cd-addiction:
:)
(oh. have you gone mama cloth yet?)
Post a Comment