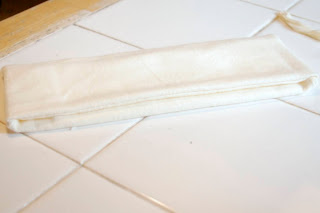
First, I pulled out an insert I already had--a non-perfected one from one of my first pairs of training pants. But, if you want to measure, then you can measure the width of the crotch of the training pants, and then make it the length you want.

If you have only one strip of fabric, sew it together at the one end. If you have two, sew it together at both ends.
It will look like this.
Now, turn it inside out.
And fold it into thirds.
The ends of this folded insert are rough. You're going to sew them together.
Your insert now looks like this.
Clip the corners and trim the edges...
Then, turn it inside out.
Voila!
Now, all your rough edges are hidden, but you don't have six layers of fabric to force a snap through either.
Pull out the snaps (or the velcro) that you want to use. Since I didn't want my snaps to stick out, I chose the colors of Ernie's skin and his nose---which is where my snaps ended up.
Pinch the insert in half hotdog style to find the mid point, then mark where you want your snap/velcro along that line.
Fold it in half hamburger style (see below picture) and match your first mark or snap to where you want the second snap/velcro to be. Mark it and add the snap or velcro. If you are using snaps, make sure you put the STUDS on the insert. That way, if you decide to use the training pants without the insert, then the snaps won't irritate precious little skin.
And if you're doing velcro, you might want more than just two. You might want to consider doing a lenghwise strip of velcro, or just three or four little squares. THat's up to you.
Now, you need to mark where your snaps are going to be in your training pants. Fold the insert in half again, hamburger, and stick it inside your training pants.
Like so.
You'll be able to feel the studs of the snaps on the insert. Mark where they touch your training pants, making sure it's centered. Since I've already centered the nose I don't actually have to measure the center for this part of my training pants. If I hadn't put a nose, I'd be making sure that I was putting the snaps in the midpoint of the butt.
Mark the spot.
Add your snaps--the socket--to the training pants, being sure that the socket faces the inside of the underwear. If you have no applique here, you might want to consider adding a little extra square of fleece for snap stability.
Now, we ant to do the same thing to the front of the training pants. With the insert still inside so you can feel the snap, measure the halfway point of the front of the training pants, and then mark your point.
I have no applique on the front, so I"ll add a square of fleece to make my snap more stable.
Now, attach the snap and you're ready to insert your soaker pad and put the whole thing on your baby!


3 comments:
adorable, are you going to sell them?
Oooh! I love those Sesame Street training pants! I was wondering if you were going to sell them too! :)
-Sarah
SHull2319 at gmail dot com
Um.....that is PRECIOUS. LOVE that.
You're a genius. =)
Post a Comment