I used:
2 yards of cotton quilting fabric
2 yards of PUL (the waterproof material used in cloth diapers)
2 packages of biased tape
A borrowed hairdressing cape.
My sister, C, is a new hairdresser--and a good one at that! I thought, what could be more special than her own, personalized hairdressing cape? So, I borrowed my friend's cape, taped it instead of pinning it to my fabric (because it was plastic and I didn't want to make holes in it) and cut out the pattern for my sister's cape.
It was pretty easy because a hair dressing cape is really just a rectangle (2 yards worth) of fabric with rounded edges.Then, cut a slit down 1 1/2 - 2 feet in on the one end, and cut a hole for the head.
You want to cut the cape from both the cotton fabric and the PUL and then lay them on top of each other. I chose to leave the shiny side of the PUL facing out in the back, but you can face it the other way too if you want. Next, pin the two pieces together and add your bias tape!
Add some bits of velcro (or snaps) to the neck so it can be attached, and you're done!
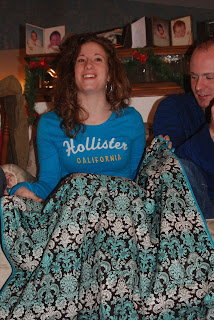
My husband loves getting haircuts from C so he was the first one to wear the lovely cape. Handsome, huh? Sorry, he's all mine!My sister loved her hairdressing cape so I'm happy! It's not a cape that can be used for coloring, though, because it will stain. You could always get some clear plastic instead of PUL and layer that over top of the print if you wanted preserve the print and use the cape for dye jobs too.


No comments:
Post a Comment