Why I Choose to Use Cloth Diapers

Product Reviews


I'd love to review your products and help you spread the word about what you sell. Contact me at clothdiapermommy@yahoo.com if you have a product you'd like me to review and/or giveaway.
Showing posts with label wool. Show all posts

Thursday, April 5, 2012

Dyeing Wool with Easter Egg Dye


It started off as a normal morning with extraordinary amounts of laundry to fold and dishes to wash.  I had my to do list and I garnished it with two or three knitting projects I allow myself to indulge in during naptime.  And of course, since Easter is right around the corner, I carved in time for some Easter Egg coloring, which my little Bunny loved. 


We colored the eggs, and used the magic crayon on them, and Bunny learned the hard way that you can't throw them into the basket.  They came out beautifully and she was very proud of our work.
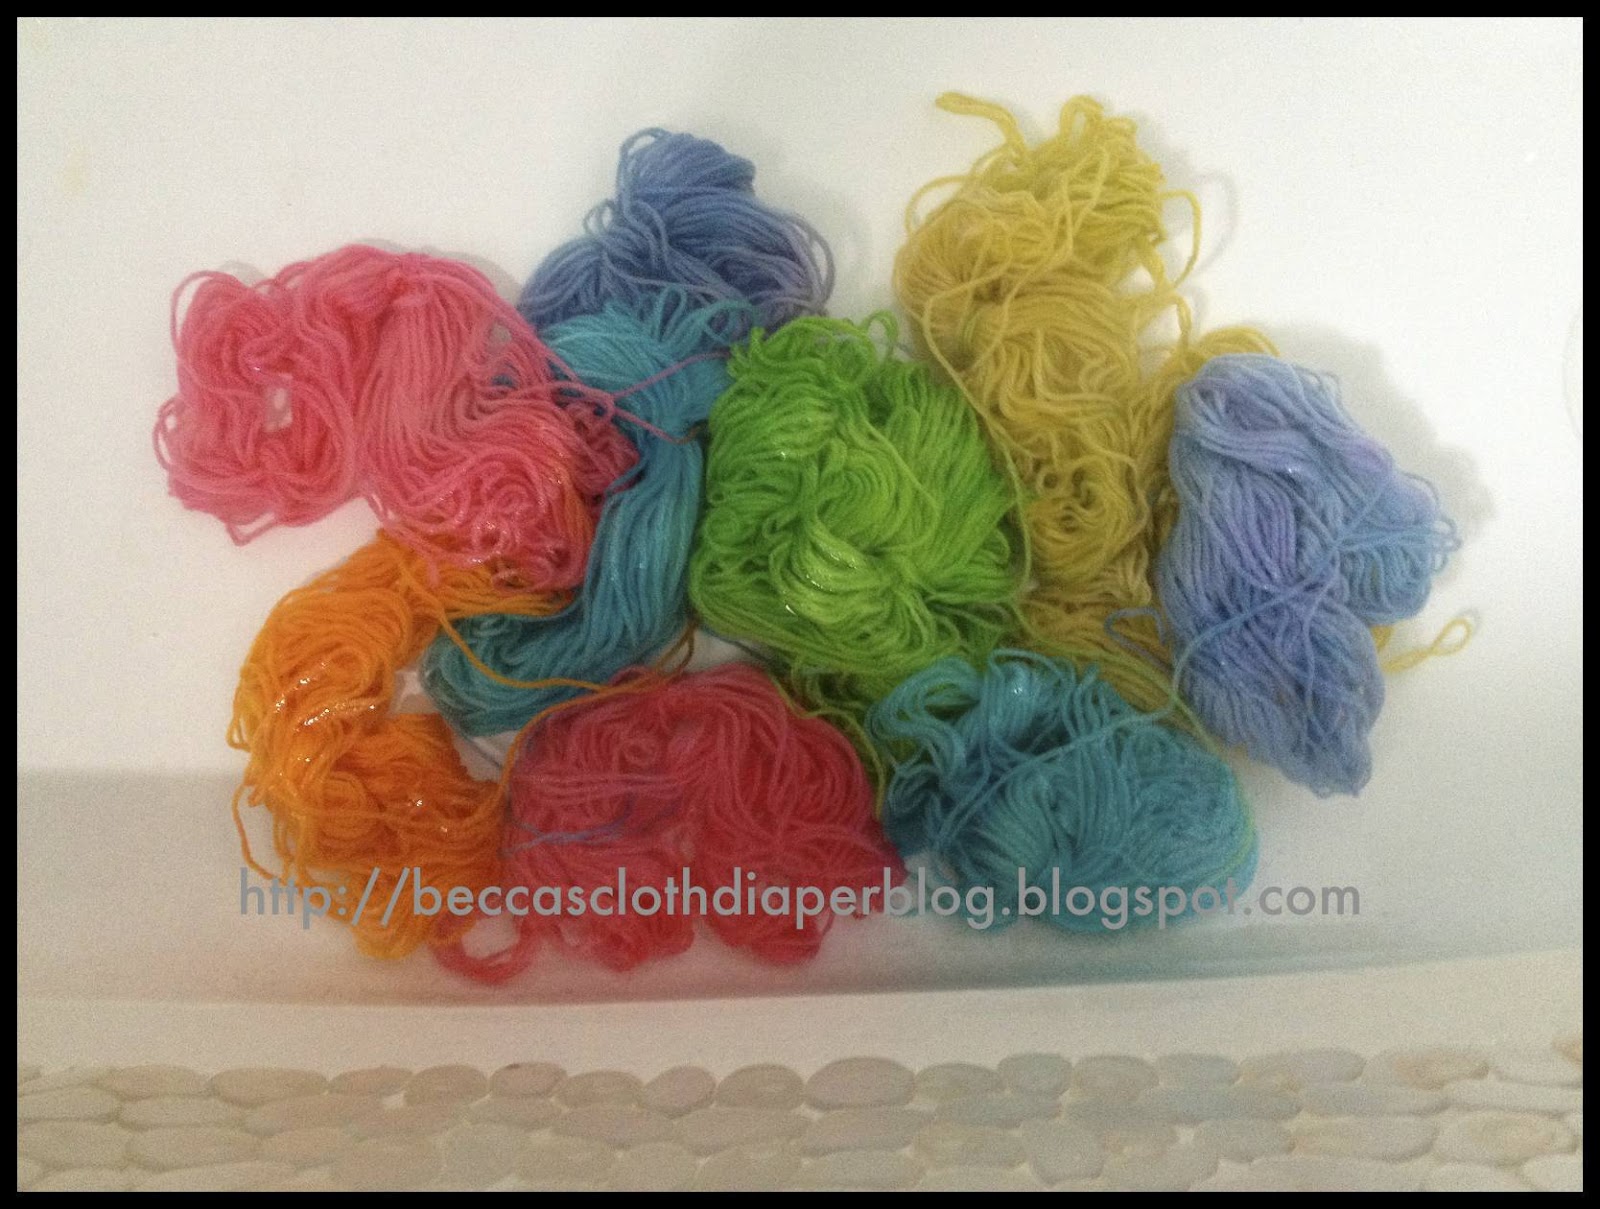
And then, I looked around at the cups of dye and I just couldn't bring myself to throw it all away! What a waste! So I looked online and found a way to use it--dyeing my wool yarn.  Here's the tutorial if you're interested in trying it yourself.  I'm not going to give you all the scientific details here since she explains it so well.  

THUS began a project that didn't take much time for what it was worth, but did take an hour or so of time out of my already busy day.  But it was well worth it. 
I wanted striping yarn, so I separated a skein of Lion's Brand Fishermen's wool into even swatches, knotting each one together, but keeping the skein whole.

 Then, I soaked the wool in 1 part vinegar, 4 parts water--but just enough to make the wool damp throughout, not dripping.  It's important that it is ALL damp--that there are no dry parts. 


I put the sections in bowls, (all connected--which was a bit confusing, since I wanted to keep them in rainbow order for my striping) and then, I covered them with plastic wrap--the stick and seal kind-- and microwaved them in 3 minute increments with 5 minute breaks in between until the water ran clear.


I pulled the wrap off and they were VERY hot, but the water was clear! I wanted to transport them to the tub without burning myself so I put them in a bowl of hot water first.
Per the instructions on the tutorial, I knew that the colors were set since they didn't run at all when I put them in the water.  I couldn't believe it worked just as she'd prescribed!

I let it soak in the bathtub in cold water for 10 minutes or so to rinse the vinegar out.

Then I pressed it between two towels to get the water all out--carefully keeping the sections of my long piece of yarn in order so as not to cause tangling problems later on.
Then, I put it in my basement and let it dry on my drying rack.

My house smelled like wet sheep and vinegar for at least 12 hours, and my hands were dyed for awhile, but it was a small price to pay.

Now, I'm rolling the whole thing into one, big ball of yarn! This was so fun, and Fishermen's wool is pretty inexpensive if you buy it at Hobby Lobby or Michael's with a coupon that I think I might invest in this yarn ball winder from knitpicks.com because I'll DEFINITELY be doing this again!

Wednesday, March 28, 2012

New in the Shop: TWO Dollies!

We just love these dollies in my house! It takes me about a week of naptimes and bedtimes to make one, so over the past month I've done about four--and three are in my shop now! I went to www.knitpicks.com and got all sorts of wonderful skin tones and hair colors for dolls in the future, including this amazing heathered blonde color from their Palette wool yarn collection.  I hope you enjoy them!
Come on over and check them out. 

One blonde doll:


And one African American doll:


Monday, December 27, 2010

Baby Mittens: Knitting pattern


Now that Christmas is over and you probably find yourself with a little time to relax, it's a great time to cuddle up in a cozy chair and take up your knitting needles.  I have the perfect project for you--one that I completed in an afternoon while dividing my attention with my toddler.


I decided I didn't like the mittens Bunny had, so what better to do with a free afternoon than to make her some mittens that I do like, so I came up with this pattern.  I've never really written a pattern down before so bear with me.

Materials Needed:
Worsted weight yarn--I used about 1/4 of a ball of Paton's wool
Size 5 or 6 double pointed needles
Tapestry needle
scissors

This pattern is for my 15 month old and leaves plenty of room to grow while still fitting her snugly.  If you use wool, remember that it will relax a bit over time.

1.  Cast on 24 stitches (or some number divisible by four based on the measurement of your baby's wrist)

2.  Knit 2, purl 2 for ten rows (you can do less if you want, but I wanted a nice, thick cuff to make sure Bunny's little wrists are well covered) 

3. Knit (stockinette stitch) in the round for 5-6 rows or 1/2 inch (the distance from your baby's wrist to the bottom of his/her thumb.

4. Create the thumb hole: Split your circular stitch and knit back and forth for 4 rows alternating with a row of purl and a row of knit.  If you need to make the thumb opening larger, you can add rows in increments of two, making sure to end with a knit row. 

5. Go back to knitting in the round using only knit stitch. This is when you will connect either side of your knitting that you split at #4.  There should be a nice hole in your mitten now where you will add a thumb later.  Continue knitting stockinette stitch for 2 1/2 inches, or the length from your baby's thumb to the top of his/her fingers. 

6.  Close the top of the mitten: knit 4, knit 2 together (4x)
                                                 knit 3, knit 2 together (4x)
                                                 knit 2, knit 2 together (4x)
                                                 knit 1, knit 2 together (4x)

7. After cutting a tail of at least 8 inches, use a tapestry needle to thread your yarn through these remaining 8 stitches.

8.  Add the thumb: Using two double pointed needles, start picking up stitches at the bottom of the thumb hole and gradually work your way up.  Picking up the stitches this way will make your thumb point upward rather than sticking straight out
Pick up 4 stitches at the base of the thumb hole.  Purl them.
At the end of that purled row pick up a 5th stitch.  Knit the row.
At the end of the knitted row, pick up a 6th stitch.  Purl the row.
At the end of the row pick up a 7th stitch.  Knit the row.  At the end of the row pick up an 8th stitch. 
Divide the 8 stitches you have onto two needles.
Use your remaining two double pointed needles to pick up four more stitches around the top of the thumb, completing the circle.
You will have picked up 12 stitches total around the thumb hole.
 *If the instructions for number 8 are too difficult, you can simply pick up 12 stitches around the thumb hole.  This will cause the thumb to stick straight out rather than to point upwards, but it will still be fully functional.  Aesthetically, I just prefer my thumbs to point upward. :-D

10.  Knit in the round for two rows.

11.Then knit 4, knit two together (2x).  You will have 10 stitches.

12.  Continue knitting (stockinette stitch) for 1/2-3/4 of an inch (or the length of the thumb)

13. knit 3, knit 2 together (2x)
      knit 2, knit 2 together (2x)

14.  After cutting a tail of at least 8 inches, use a tapestry needle to thread your yarn through these remaining 8 stitches.

15.  Weave in all your ends.

16. (Optional).  If your toddler is like mine and likes to take their mittens off, adding a string between both mittens so you can thread them through the arm of his/her coat is a great option.  I picked up 3 stitches on the bottom of the cuff at the back and knit an I-chord for about 28 inches.  Then, I attached the I-chord to the other mitten at the bottom of the cuff in the back.  An I-chord has some stretch to it so you don't want to knit it too long.  But you want it long enough that the mittens hang out about an inch or two from the coat sleeves.  I'm sorry, I do not have any pictures of this part of the process currently.

Now, enjoy watching your baby's hands keep toasty warm in his/her new mittens!  


Saturday, April 3, 2010

Knitting Lessons the sequel

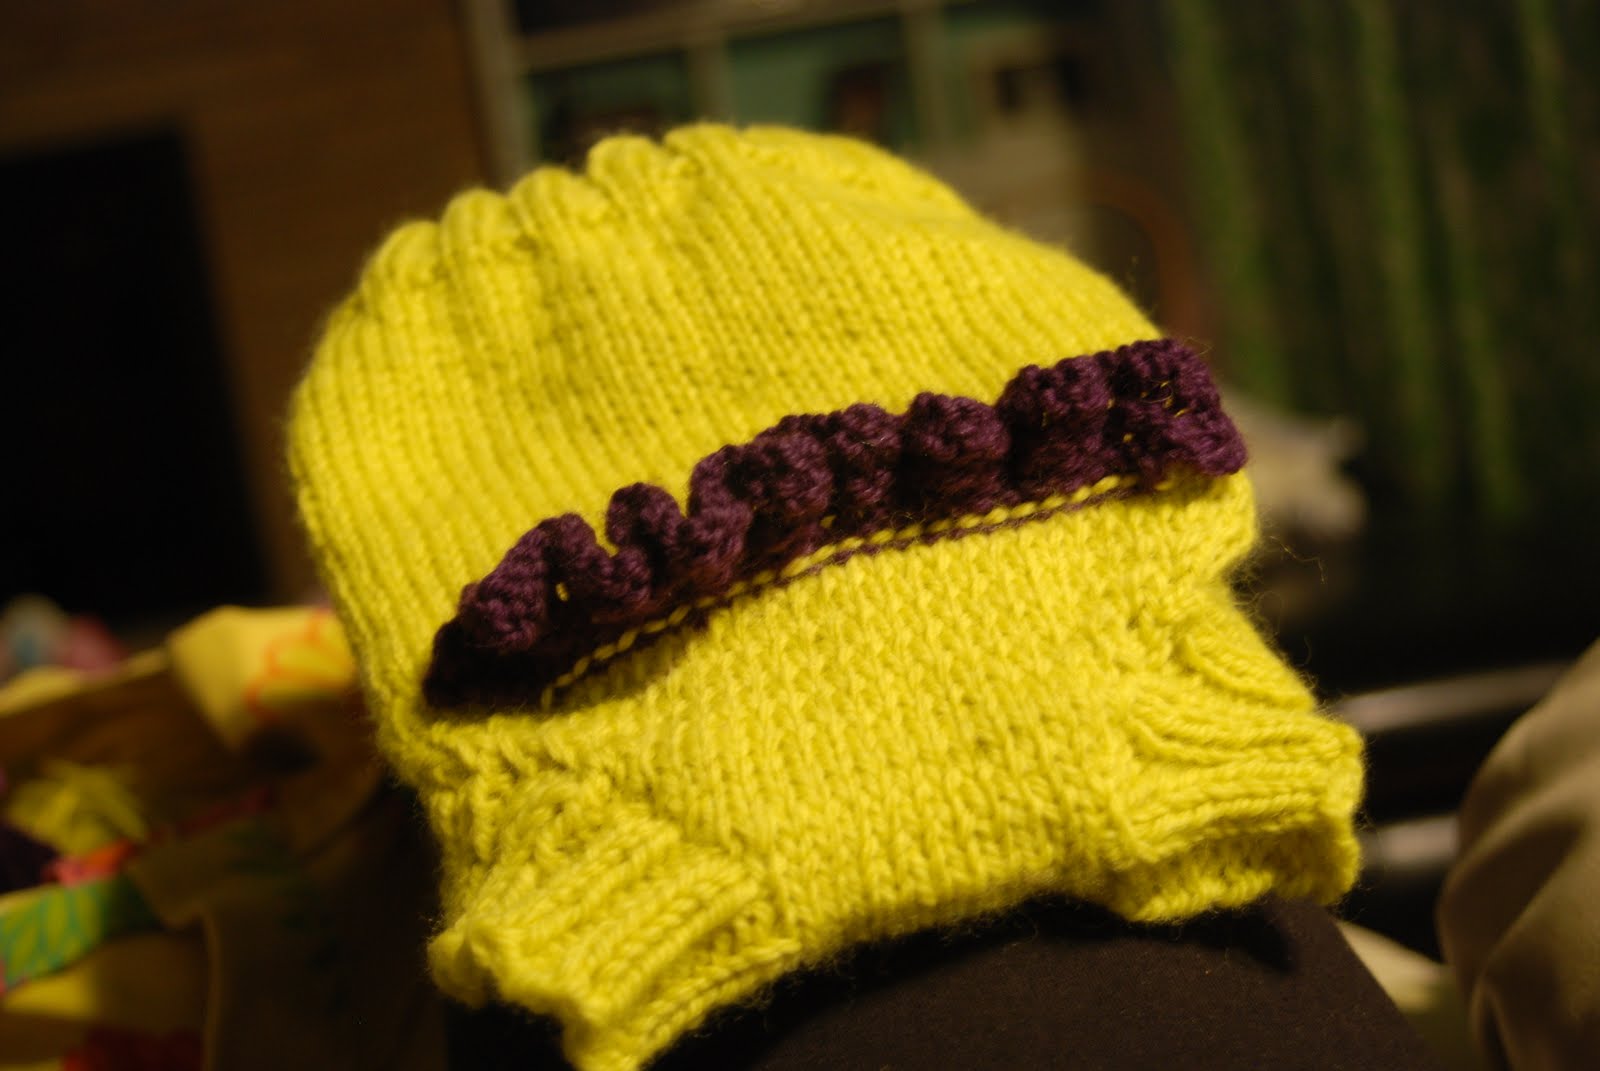
I just finished knitting my first wool cover and I'm SO excited! You can go back to this post to see the beginning part of the process, if you're curious.  I'm still very new to knitting 3D garments so this is all very VERY exciting to me!  I can't believe I did it and it only took a little over a week and a half!!! Woo hoo!!! I love wool.  I'm in a new love affair with wool covers and all natural fitteds/prefolds/contour diapers.  Putting natural fabrics on my daughter always cures her diaper rashes right away. 

The blue one is the one my friend made me.  I made some changes to it to make mine (the yellow and purple one), namely shortening the rise and lengthening the ribbing at the waist and legs.  In addition, I thought it would be cute to add another ruffle.  What do you think?