Why I Choose to Use Cloth Diapers

Product Reviews


I'd love to review your products and help you spread the word about what you sell. Contact me at clothdiapermommy@yahoo.com if you have a product you'd like me to review and/or giveaway.
Showing posts with label kamsnaps. Show all posts

Wednesday, October 26, 2011

Tutorial: Insert for Fleece Training Pants.

If you read my blog post on Tuesday, then you already saw the tutorial for fleece training pants.  However, the training pants are not done until there is an absorbent layer in them.  In my opinion, with out the absorbancy, it's sort of silly to make training pants out of fleece, since fleece contains moisture.  So, without further ado, here is a SUPER easy tutorial to put the absorbency in these little training pants. 

First, I pulled out an insert I already had--a non-perfected one from one of my first pairs of training pants.  But, if you want to measure, then you can measure the width of the crotch of the training pants, and then make it the length you want. 
Then, I cut one, long strip of fabric that was the length I want, and the width multiplied by six.  If you do not have a strip of fabric long enough, you can cut out two pieces that are the length of the insert and the width multiplied by three. 

If you have only one strip of fabric, sew it together at the one end.  If you have two, sew it together at both ends. 
It will look like this. 
Now, turn it inside out. 
And fold it into thirds. 


The ends of this folded insert are rough.  You're going to sew them together. 

Your insert now looks like this. 
Clip the corners and trim the edges...

Then, turn it inside out. 
Voila!
Now, all your rough edges are hidden, but you don't have six layers of fabric to force a snap through either. 
Pull out the snaps (or the velcro) that you want to use.  Since I didn't want my snaps to stick out, I chose the colors of Ernie's skin and his nose---which is where my snaps ended up. 
Pinch the insert in half hotdog style to find the mid point, then mark where you want your snap/velcro along that line. 
Fold it in half hamburger style (see below picture) and match your first mark or snap to where you want the second snap/velcro to be.  Mark it and add the snap or velcro.  If you are using snaps, make sure you put the STUDS on the insert.  That way, if you decide to use the training pants without the insert, then the snaps won't irritate precious little skin. 

And if you're doing velcro, you might want more than just two.  You might want to consider doing a lenghwise strip of velcro, or just three or four little squares.  THat's up to you.

Now, you need to mark where your snaps are going to be in your training pants.  Fold the insert in half again, hamburger, and stick it inside your training pants. 
Like so. 
You'll be able to feel the studs of the snaps on the insert. Mark where they touch your training pants, making sure it's centered.  Since I've already centered the nose I don't actually have to measure the center for this part of my training pants.  If I hadn't put a nose, I'd be making sure that I was putting the snaps in the midpoint of the butt. 
Mark the spot.
Add your snaps--the socket--to the training pants, being sure that the socket faces the inside of the underwear.  If you have no applique here, you might want to consider adding a little extra square of fleece for snap stability. 

Now, we ant to do the same thing to the front of the training pants.  With the insert still inside so you can feel the snap, measure the halfway point of the front of the training pants, and then mark your point.
I have no applique on the front, so I"ll add a square of fleece to make my snap more stable. 
Now, attach the snap and you're ready to insert your soaker pad and put the whole thing on your baby!


Monday, April 18, 2011

Is it Prefold or fitted???

One of my friends and I both sew cloth diapers.  She does them just for her son, and I do them, as you know, for friends, family, and My Etsy Shop

In any case, we've often given each other diapers--sometimes store bought, sometimes sewn.  It's sort of fun to obsess about cloth diapers with her occasionally, share our new CD discoveries, and show off the adorable little things we've been making lately.


A couple of months ago, she found a pattern online for this oddly shaped prefold.  I don't remember if the pattern called for elastics or if it's something she added herself.  But I do know that she tweaked the pattern to make it more form fitting and that some of this idea is all her own.  In any case, she made about five of them, and I would put the snaps on for her, since I have the Kamsnaps pliers and she won't ever need enough snaps to justify buying a set for herself.  Despite the fact that I didn't need to be compensated, she offered me one of these adorable diapers made out of the most luscious bamboo velour and I was so in love with it, I just couldn't refuse!  It's not only soft, gentle, and fitted, they also dry quickly because  it's made of only one layer! Best of both worlds!

Check it out:


In our house we use it both covered and uncovered; for night and day.  I think it's currently my favorite diaper! :-D

(Pardon the picture quality.  I find it hard to chase my daughter down these days and get a good shot from her because she just doesn't sit STILL for anything!)

Monday, April 4, 2011

Tutorial: Adding snaps (or velcro) to prefolds

I'm going to do my best to attempt a snapping prefold tutorial, so bear with me :-D  There are no patterns I feel I can give you here, because where you place your snaps (or velcro) depends on the size of your baby and how you fold your prefold.

First, you want to fold your prefold onto your baby using the fold you normally prefer to use.  This can work with the angel fold, twist, or the jelly roll.


Take a pencil and mark the place where the back of the diaper overlaps on the front of the diaper.  If you noticed, I simply marked a square on both places--that gives me an area where my closures can safely go.  (Don't worry, these markings should come out in the wash.  However, if for some reason they don't, no worries! You're kids gonna poop on them anyway ;-P) Notice, that since I'm putting this prefold on a baby with a smaller rise, the back is folded down.  If you have a bigger baby, then folding down in the back is not necessary.  (I've altered the following photos slightly so you can see my pencil marks better)

Within the squares I've drawn, I need to decide where my snaps will go.  I use snaps from Kamsnaps.com and attach them with a $27 pair of snap pliers which I love.  I love Kamsnaps, but I think other places sell snap pliers and snaps as well so you can shop around.  All that just to say, you don't have to break the bank getting an $80 snap press.   If I'm using velcro, then I'll simply attach squares of hooks to the back closures within the squares, and strips of loops to the front panels--only on the ends--within the squares.  With snaps, it's a bit more complicated since you need to measure to make sure that your snaps are all equidistant, but you're basically going to put your studs on the back flaps and your sockets on the front panel.

Once you've measured where your snaps will go, simply add your snaps.  Add the studs to the back and the sockets to the front.  I like to add a few more to the outer edge of the front panel to leave room for growth.

I also like to add some stud snaps facing the opposite direction so that when my baby gets taller, I can unfold the back flap and continue to use the prefold.  When I unfold it, the snaps facing the opposite direction turn away from baby's skin so they never dig in.  This also means that I can use the twist fold as another option.

Here's the prefold looking at it from both the back and the front once all the snaps are in their proper places.  If you click on the picture, you'll get a bigger view so you can investigate it more if you need to.


Here's the prefold snapped a couple of ways:
1. The Jelly Roll with the back flap unfolded


2. The Twist with the back flap unfolded:


3. Angel Fold with the back flap folded down:


4. Angel Fold with the back flap unfolded for taller babies:

Here it is on Bunny:


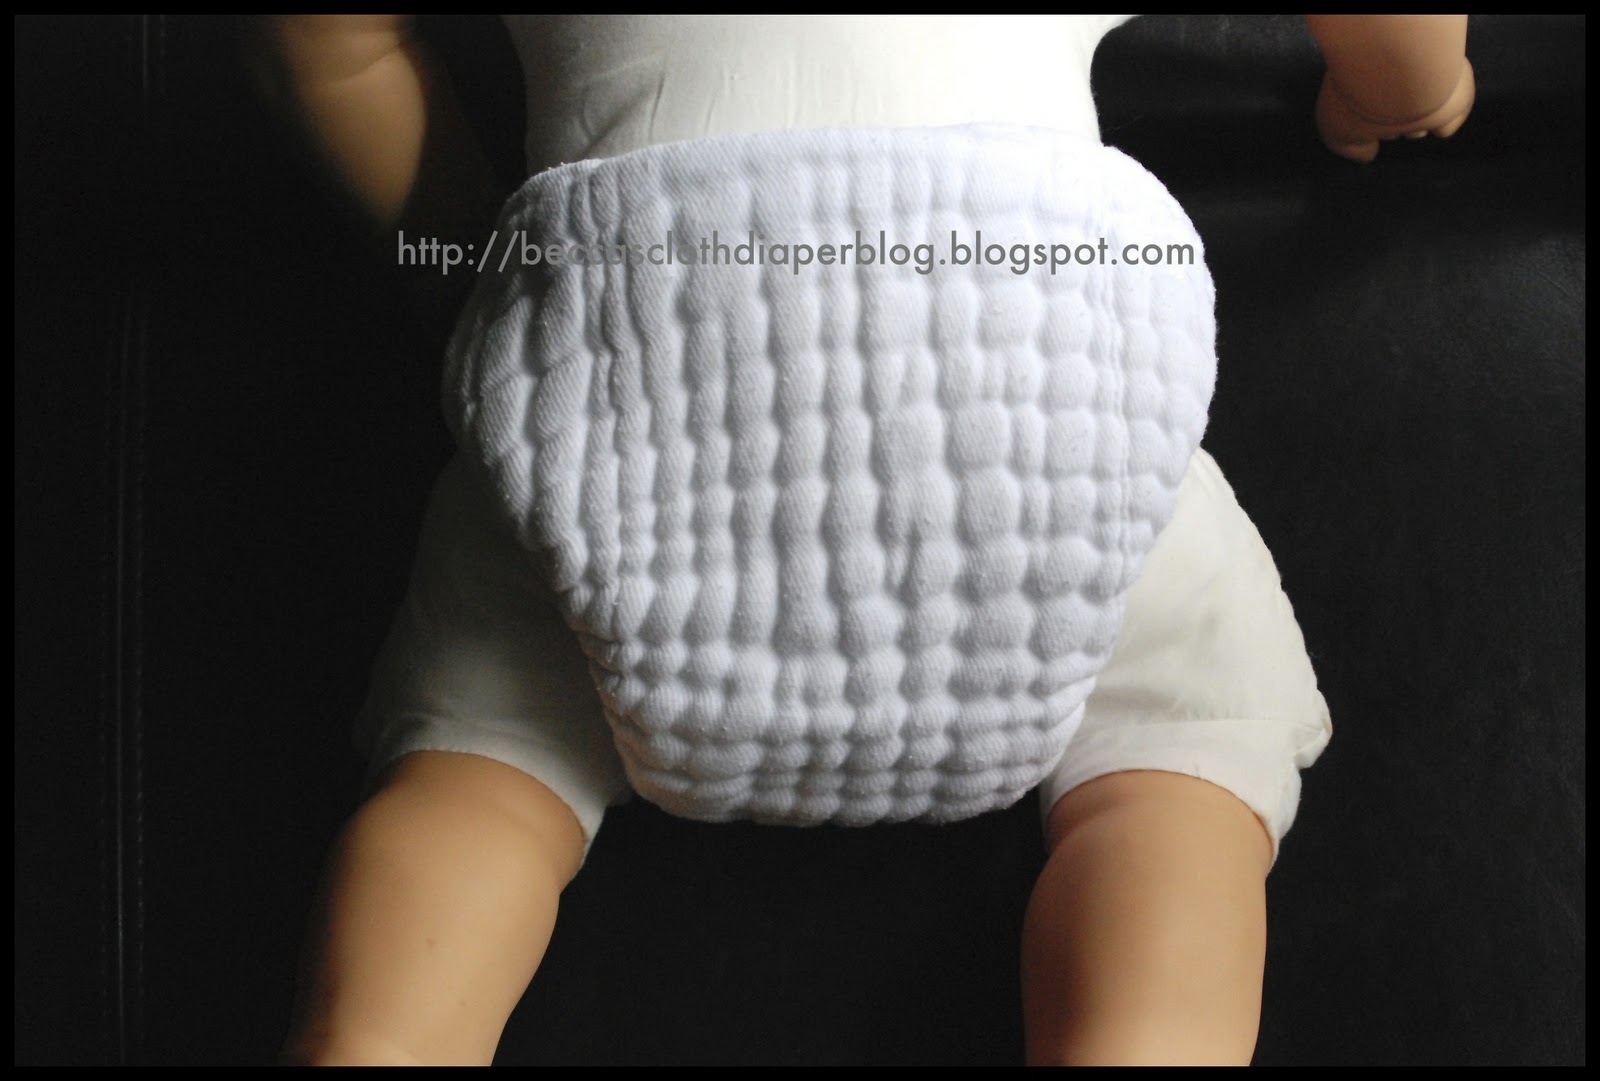
If you want to try something really awesome, you can add elastics to get a tighter fit around the legs and contain the poop better.  I do this with the angel fold only.  You can either use another diaper to draw the elastic lines or you can fold the diaper the way you would with the angel fold and just draw a line along the fold that curves around the leg.  This is what the diaper will look like flat when the elastic is added:
Once the elastic is in, just fold like so, making sure to follow the line of the elastic, then pull the back sides out and snap it.

I don't have a picture of the snapped prefold with elastics on Bunny yet because she was napping when I took these pictures, but here it is modeled on her life sized baby doll who is about as big as she was when she was 6-9 months old.


So that's it! I hope you find this useful and easy to understand.  Let me know if there's something I can clarify for you!