Why I Choose to Use Cloth Diapers

Product Reviews


I'd love to review your products and help you spread the word about what you sell. Contact me at clothdiapermommy@yahoo.com if you have a product you'd like me to review and/or giveaway.
Showing posts with label T shirt diapers. Show all posts

Wednesday, May 18, 2011

Tutorial: Cloth Diaper Friendly Pants out of Shirt Sleeves

Okay, today, I want to show you how to make the easiest baby/toddler pants ever out of an old long-sleeved shirt!  In fact, in total I think it took me the better part of 20 minutes--maybe 30.  It was so easy!

For this project you will need:
1) ONE long sleeved shirt.  The larger the baby, the larger the shirt should be.
2) ONE pair of pants to use as a pattern.
3) A length of elastic that is long enough to fit snugly around your baby's waist (plus seam allowance)
4) A sewing machine.


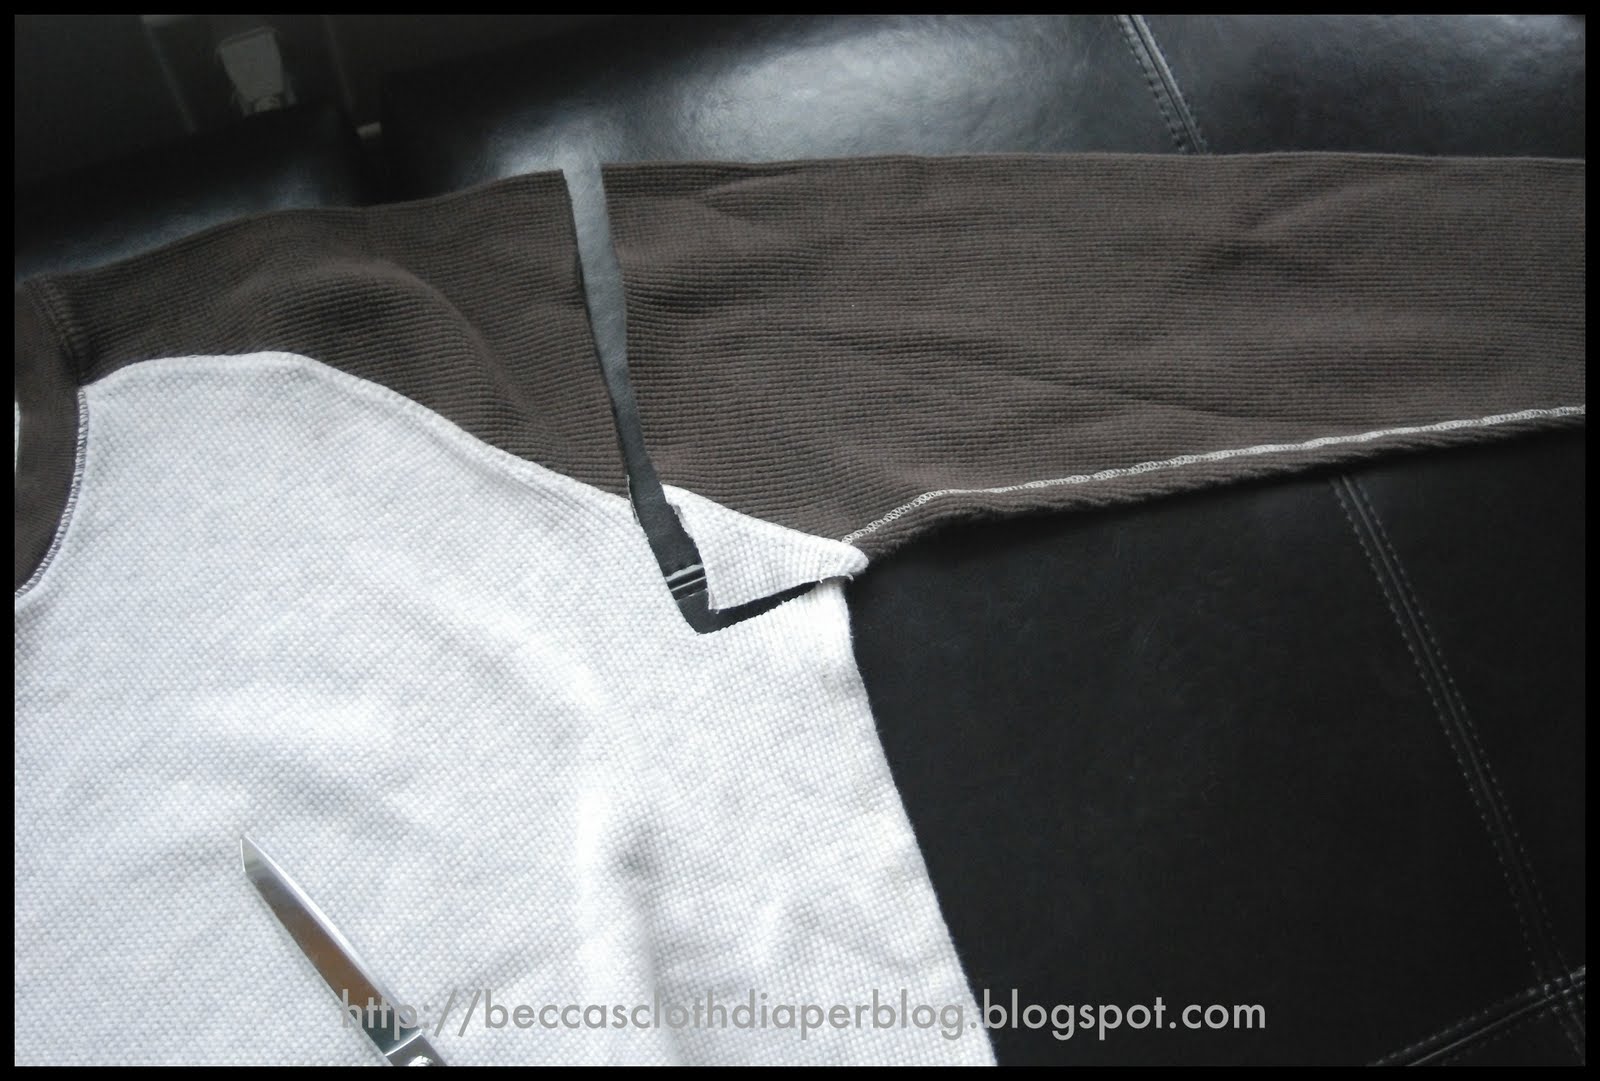
STEP ONE: Fold your pattern pants in half and lay them on the sleeve to get the length.  You'll want to cut about 1-2 inches higher than the pants to leave room for the elastic sleeve. Now, cut the sleeve off. Don't cut the crotch out yet. 


STEP 2: Lay the first cut sleeve over the second and cut it out as well.   


Step 3: Lay the pattern pants (still folded in half) over both sleeves, and cut out the crotch. 


STEP 4: To make more room in the bottom for yoru big fluffy diaper, lay both sleeves down next to each other with the crotch's facing each other and gradually cut a diagonal line from the middle of the front of each to the side.  This will give you more room in the butt. 


STEP 5: Open each sleeve at the crotch and sew together through the crotch with right sides together. 


Do NOT use your overlock stitch yet if the seams of your sleeves are on the insides of the legs.    I did, and found that it caused a bit of trouble when I tried to lay my seams flat.  If you placed the pants so that the pre-existing seams of the shirt were on the outer thigh, then you can use an overlock stitch. 


When you're done sewing the crotch together, your pants will look like this:

STEP 6: Now it's time to measure your elastic.   To get the right fit for your child, wrap the elastic around his/her waist until it's as snug as you want the waistband of the pants to be.  Then, add your seam allowance--about an inch altogether, or 1/2 inch on each side. 


STEP 7: Lay your elastic on the waist of your pants, and fold over to get the correct measurement for the sleeve (leaving 1/2-5/8 inch seam allowance)
  

 STEP 8: Sew the elastic sleeve down.  I did not pin, but it's probably advisable to do so. 


STEP 9: Thread your elastic through the sleeve. I use a safety pin at the end of the elastic to facilitate pulling it through. 


STEP 10: Sew elastic ends together.  Use a zig zag stitch to sew the ends of your elastic together. 


STEP 11: Admire and wear!!!


We're very pleased with Bunny's new pants. If I had it to do over again, I'd put the decorative stitching on the outer leg rather than the inner leg, but they fit well, have lots of room for her cloth diaper, and there is plenty of room for her to grow.

Wednesday, March 2, 2011

New in the Shop

Another diaper...


I made this one with my new machine and I don't have a walking foot yet, so there are puckers in the inner layer of fabric.  Because of that, I lowered the price of this one $.50.

And I'm trying something new:


...and it's also made from upcycled Tees.

Monday, February 7, 2011

New in the Shop

Just listed two more diapers.  I'm getting them in there slowly but surely!


 This Sunflower diaper wasn't supposed to have a royal blue inner layer--that was supposed to be hidden.  Oops! But I kinda liked the way it looked and I was too tired to rip out the stitches and start over, so here it is--accidentally. 


I particularly like this teal diaper with the orange snaps.  Such a great colorful feast for the eyes.

I'm wide awake at 5:30, which wouldn't be unusual except for the fact that I woke up at 3:30 to my daughter's vicious screams and couldn't go back to sleep, and the sour deal was sweetened by the discovery that while I slept I earned money from not one but TWO sales! I've never had two sales happen in one night.  I'm super excited because I'm saving up for a sewing machine! Actually, I've already earned enough for the machine (thanks to Etsy and my posts at Diaper Junction's the Cloth Diaper Blog) but these sales give me back some money in my account.  Yay!)

Thursday, February 3, 2011

New in the Shop

I am in the middle of finishing the diapers I posted the other day.  Three of them are done and in the shop--two mediums and a small.  They are more absorbent than my other diapers because they have 9 layers instead of 8, including some blue jeans. 
Here they are:


And this one is just so sweet it will be really hard for me not to keep it for myself if someone doesn't snatch it up soon!:


Wednesday, December 1, 2010

Night Time Leaking


Bunny's pocket diapers have rarely leaked at night-- I mean, rarely if ever!--and we only use doublers occasionally.  But it's been three or four nights now that her diapers have leaked massively, soaking her clothing from the waist down.  At first I thought it was just a fluke, but then it happened night after night and with all my favorite brands of pocket diapers--Bum Genius, Happy Heinys, and my all-time, hands down, favorite pocket, Fuzzi Bunz.  When my Fuzzi Bunz leaked, I knew that it was time to do something differently.

So, tonight, Bunny is in one of my T Shirt Fitteds with a wool cover and two doublers.  Yes.  It's excessive, I know, but I'd rather start heavy and pull back.  I mean, it's this, or wake her up 1-2 times a night to change her which means that once awake, she'll nurse so much that I'll have to eat a fourth meal around 3am to make up for the calories lost and the hunger pangs that will follow, not to mention the sleep that will evade me and threaten to overtake me as I attempt to teach my high schoolers each morning.  In any case, I can't imagine wool failing.  PUL is great and all, but it repels and creates a barrier and when the absorbency of the inner layers has reached it's limit, then the moisture has nowhere to go but out, unless the diaper happens to be perfectly sealed at the leg and waist openings, which none are.  But wool absorbs, and does so slowly, soaking up more than 1/3 of it's weight so that if the absorbent layers aren't enough, it should pick up the slack.  At most, it will be damp in the morning, but it certainly shouldn't make her clothing damp.

If fitteds are going to be a regular night time thing for Bunny, I think I'm going to have to start adding a stay dry layer to them--well, at least to Bunny's fitteds.  I don't like the idea of using fabrics that aren't upcycled though, so maybe I'll just sew some liners for night time.  We'll have to see.  Having a heavy wetter is new for me.  I find it ironic, though, that now that she's nursing less and sleeping more, she's peeing more.  It's not like we changed her diaper when we woke up half asleep in the middle of the night before this for me to nurse her.  Maybe she's just taking in more volume.

*updated*
Fitteds with wool worked great! No more urine leaking out onto her clothes and no more nasty microfiber smell! And what's better, is that you can use a fitted underneath a fleece sleeper with no cover because fleece has many of the same water resistant properties of wool!  This means, of course, that I need to make even more fitted diapers for her.  I've really stopped using her pockets lately and I'd never had to store all 40+ of them in the basket before.  My poor changing table is overflowing with pockets gathering dust, and soon the fitteds basket will have the same problem as I keep finding sentimental old T shirts to make fitteds for Bunny.